DIY workshop cabinet made with OSB and MDF

1 Comment


OK, I completely messed up on the last attempt to build a big storage cabinet for the workshop. So let’s try it again!

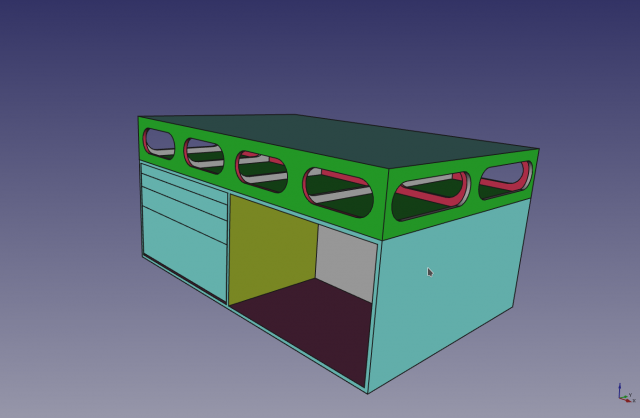
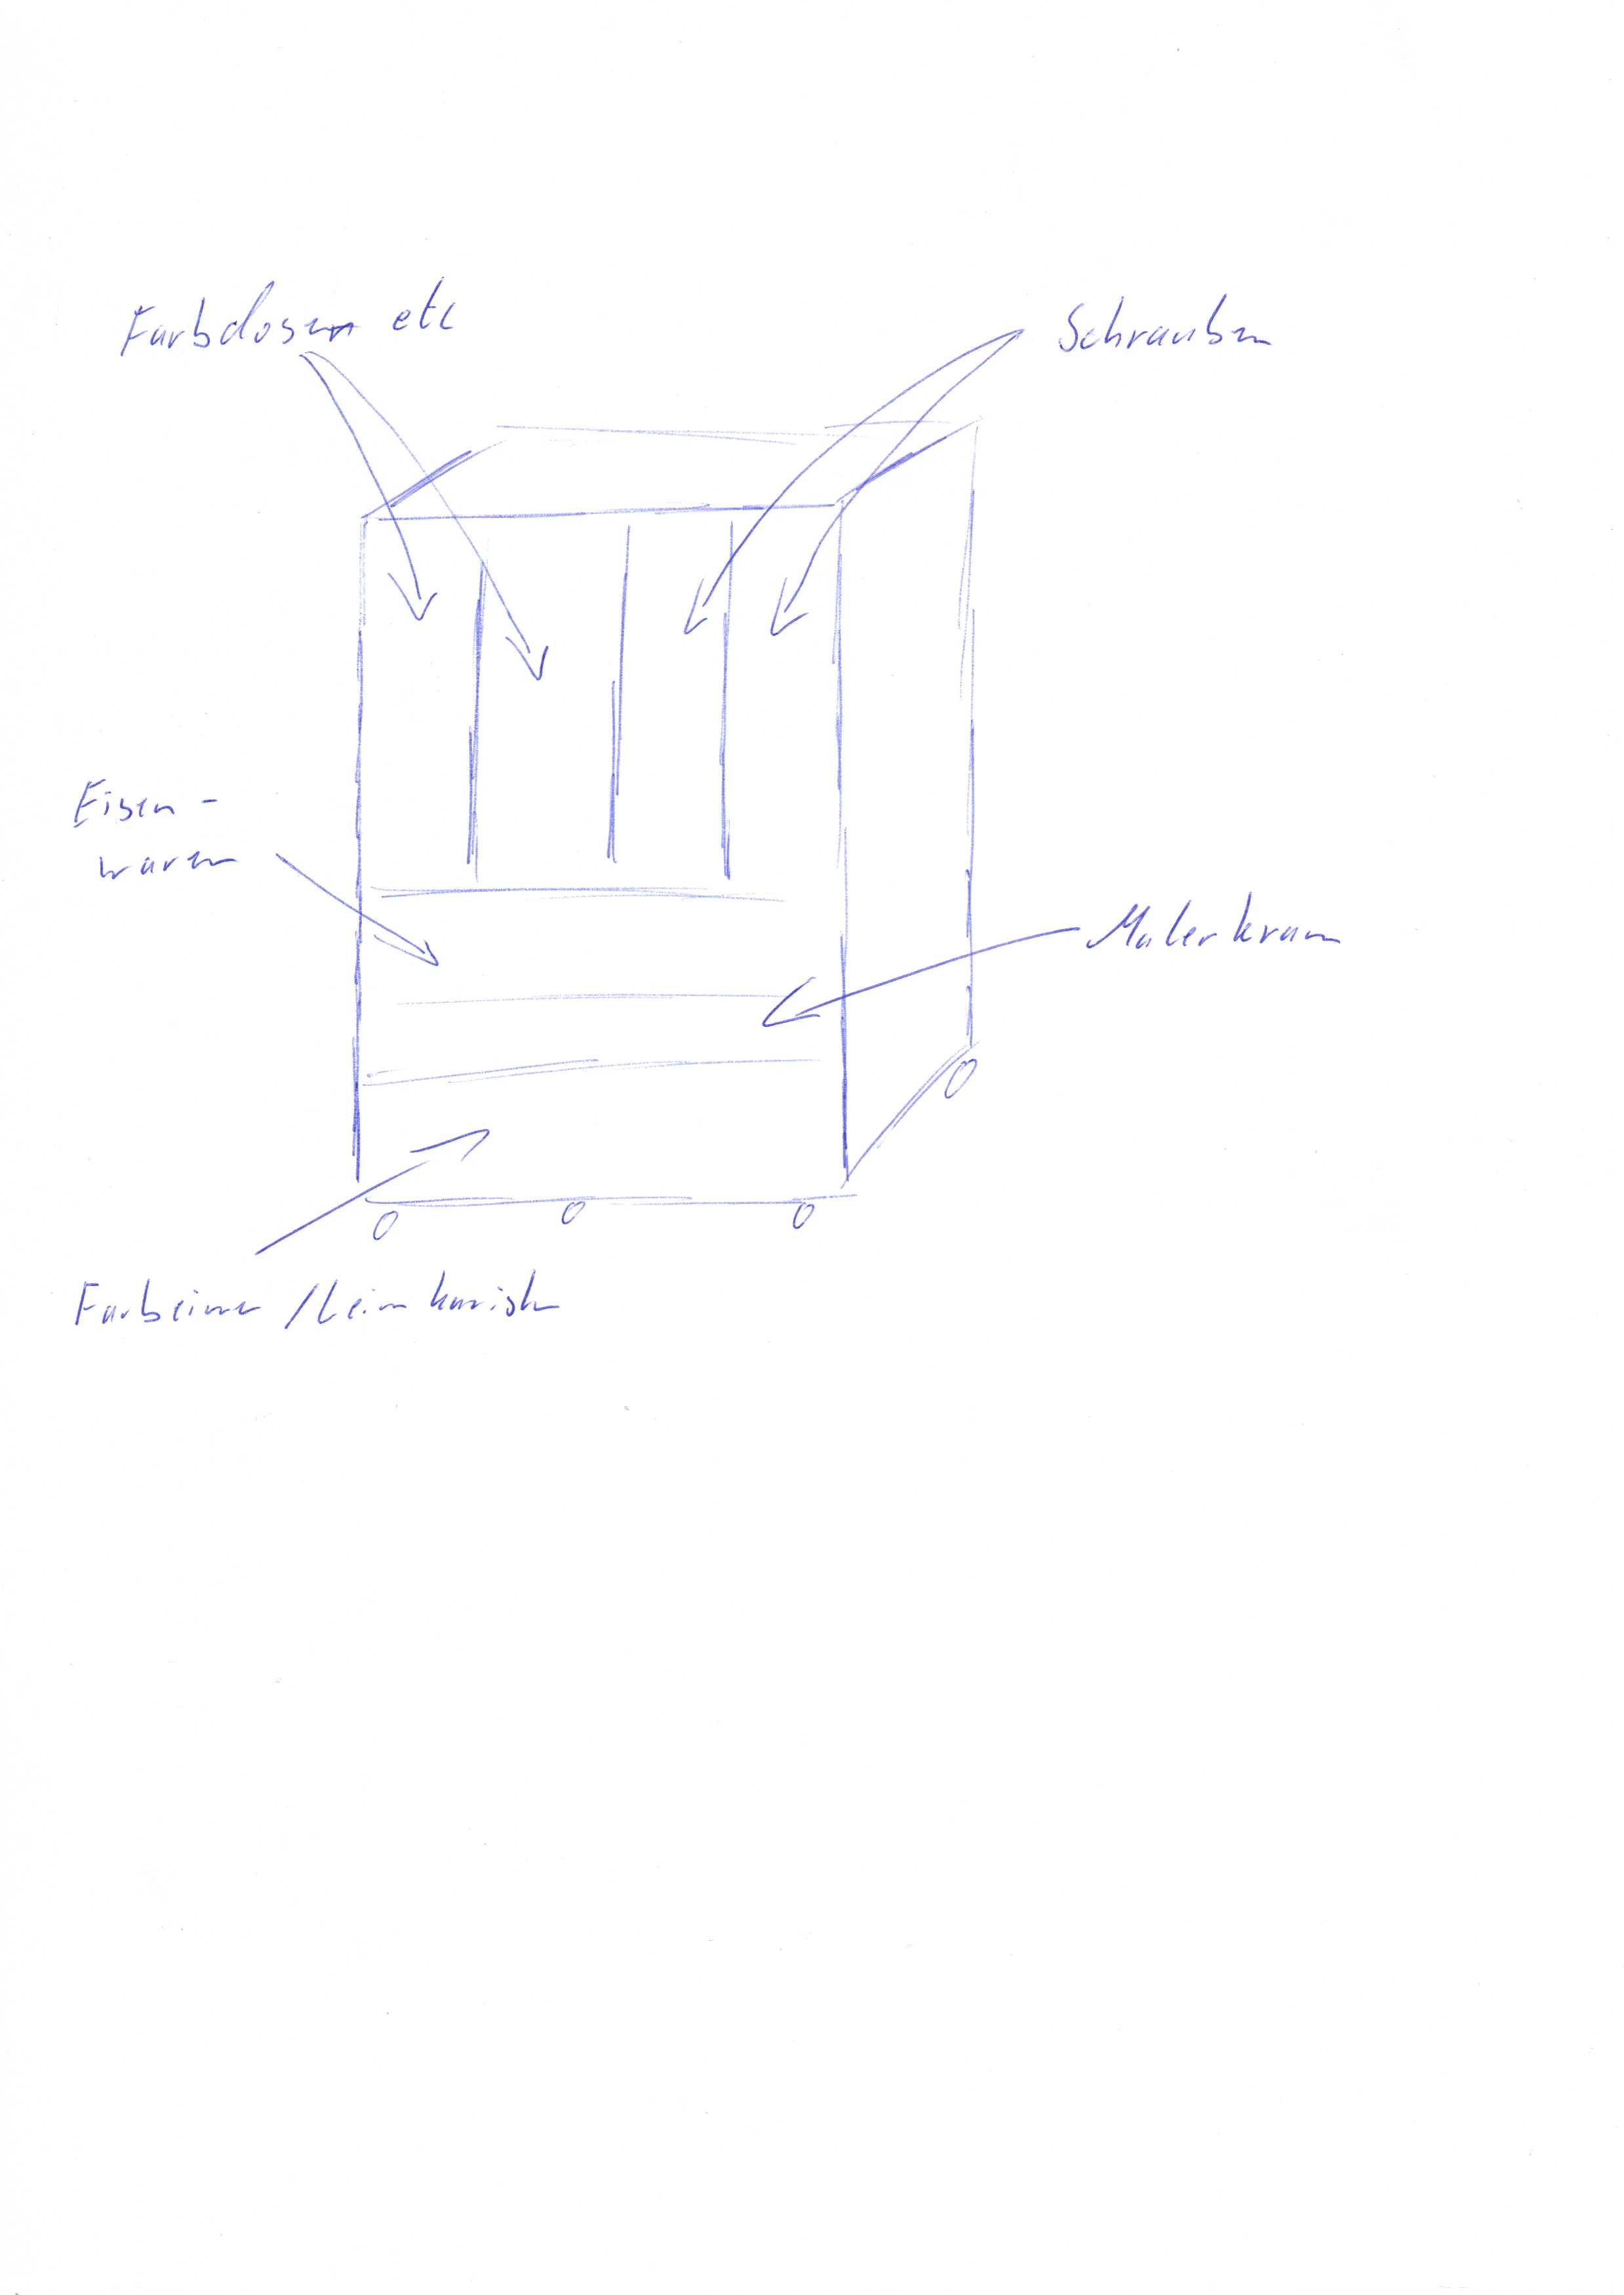
The basic ideas for the workshop cabinet stayed the same: It should be big, keep a lot of stuff, be mobile. I wanted to build the cabinet myself and it should not be too expensive. After some hours of sketching by hand and in FreeCAD I came up with this:

Sure, not really a masterpiece in drawing, but you get the idea and I could continue on to a more detailed FreeCAD-plan.

The whole cabinet is made of 18mm OSB, the drawer fronts are made out of MDF. Later, I will paint the fronts with chalkboard paint just as I did with the workbench drawers.

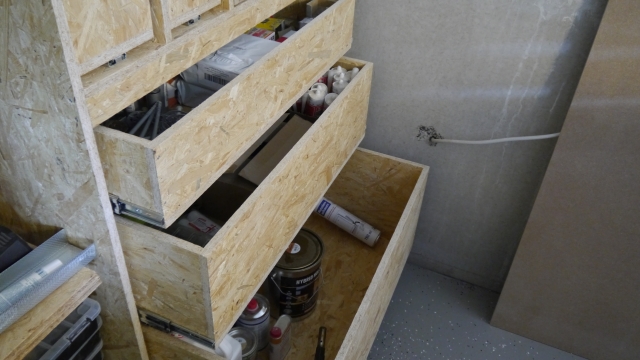
The lower part of the cabinet consists of three drawers that will contain wood glue, caulking, paint, hardware and painting supplies.

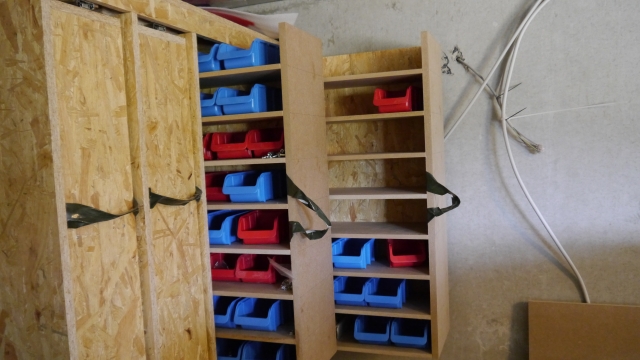
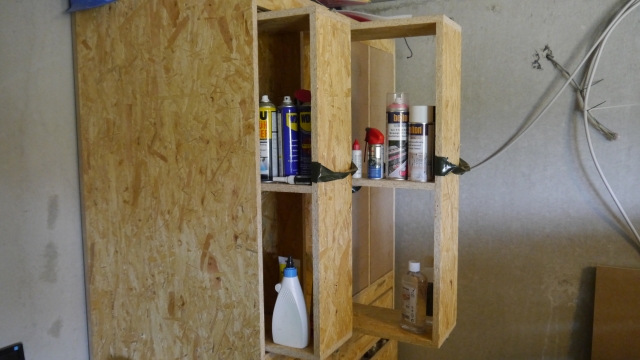
In the upper part, the cabinet has four vertical drawers for screws and spraying cans.


This cabinet is my biggest project so far. It consists of approximately 80 parts, so the first part of the build process was to cut a lot of wood. When I had completed the parts for the cabinet body, I mounted it together to gain some free space again and then continued with the drawer parts. I assembled the lower drawers late in the evening so I couldn’ t use the compressor for them. For the vertical drawers, I used the nailgun because it’s a lot easier to cover the smal nails with wood putty for painting.

All together, it took around 15 hours to build the cabinet.

The last part of the project was to put my stuff into the cabinet. I combined this with cleaning and organizing the workshop and it took me almost another two days.

Next up will be our garden. We unfortunately ruined it in the winter when we drove our car over the frozen grass and now it will surely take us a few days to get everything ready again for the kids to play outside.

If you liked this article, click the RSS icon to get news from the channel delivered to your feedreader of choice. On this blog we show you all the DIY things that we do around our house. Also, don’t forget to subscribe to our youtube channel to not miss any of our videos and follow us on Instagram!
Short Intermezzo – A new guide rail for the circular saw

1 Comment

Jeez, that one really made me upset. I had just finished cutting half a dozen sheets of OSB to size for a new shop cabinet carcass and then I noticed that nothung fit together

OK, I lost it a little bit.

For a solution, I tried to figure out what went wrong to rectify it. Pretty soon I realized that I had cut everything the wrong size. All the pieces where either too short or too long. On one piece, I even managed to cut one side too short and the other one too long.

Hm.

Some more searching and I found out that I had cut into my circular saw guide rail when I build the workbenches. That was basically when my inner nerd told me to pimp up the next guide rail a little bit… Shortly after that I was the proud new owner of some plywood and a rubber mat from a local aldi supermarket.

First, I cut all the pieces on the tablesaw. The length of all pieces is 1400mm, the width of the bottom part of the guide rail is 250mm, the upper part is 100mm.

Next, I cut a rabbet into the underside of the bottom piece. For that, I pushed the bottom piece through the table saw vertically and cut away very thin strips until I had a perfect match for the 4mm plywood that would later form the cutting edge.

Nect I attached th cutting edge to the bottom piece using some small 10mm screws. This way, I can change that piece out when its beaten up and I won’t need to rebuild the whole guide rail then. 

The rubber mat was tehn attached using spray adhesive and for the top part, I found some leftover epoxy to glue it on.

With a little time and some weights, I got a pretty decent guide rail. If you want to see some impressions of it, just click on the youtube video below. Happy building!


Workbenches for the basement workshop, part 1

No Comments

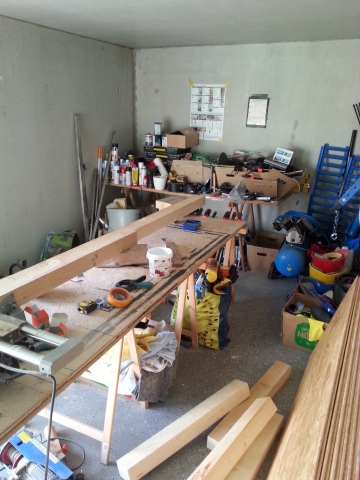
After living in our house for over a year now, it became time to do something about the mess in my basement workshop. I mean, it looked liked this:

Lovely, uh? I didn’t think so, too, but there were just to many projects to get done before I could start workshop projects. But now that I have finally started, it’s ‘go big or go home’.

The plan:

  • I’m going to build a workbench. I mean, three of them. I’ll come to that in a minute
  • Additionally, I want to build a desk in the workshop for electronics projects and all the tiny little things that would just get lost on the big workbench.
  • All the chemical stuff (like glue, paint etc.) will be locked away in a cabinet. And that should happen before my son starts gluing his tongue to the desk or his sister’s ears to the… you get the point.
  • Last but not least, some not shop-related stuff has to go down the river of life. Or into the room where the heating system is installed. Or into our future garage. Or the future shed. Or…


I watched a lot of youtube videos for inspiration and ideas about workbenches. Want to try it yourselve? Get a week or two off of work and start here. Or here. Or here. Or…

Additionally, I tested out, which size would be good for my little 20m² workshop. It should be capable of handling big projects like cabinets, but still small enough that I could move around it.

This was the first idea that I came up with:

OK, this would have taken me weeks to build and would have been far to expensive. So, the second “optimized” version now looks like this:

  • The workbench consists of three individual workbenches, each in the size of 120cm x 60cm
  • All three together build a huge work surface of 120cm x 180cm.
  • All three workbenches are on wheels. That way, I can move them out of the way easily, if necessary.
  • Beneath the tabletops, I’m going to build drawers that will hold all my supplies and tools.
  • The whole construction is made out of sheets of OSB and rough sawn construction lumber that you can buy in any given big box store.

And of course, I did a build video for youtube:

Next, I’m going to build the drawers. Stay tuned!

A primer on our English posts

No Comments

We decided that future posts will be done in german and english language in parallel and we will also do our youtube videos in two languages from now on. The posts will just be translated, I won’t give any different information in the english posts than in the german posts. Hope you will like it and always remember the german saying… ‘Broken English is spoken English…’ 🙂

Categories: Miscellaneous